

Part 1 - The Dress
I wish I could say that dress making is a simple procedure and that anyone can do it regardless of sewing background. Unfortunately, that's just not true. You want to know a bit about sewing, yes. You also want to have done several garments from store bought patterns and have a good understanding of how and clothes are generally put together.
Dressmaking is a very imprecise art. This isn't a McCall's pattern that tells you exactly what size to cut your pre-drawn shapes, where to sew and in what order. There's a lot of educated guesswork involved and honestly, I try to focus more on what works, rather than proper technique.
This dress shape is not unfamiliar to me. I have made it twice before actually, with different embellishments. So this dress only took me a few hours as I pretty much knew what shapes and sizes to make, with little guesswork or trial and error.
 |
| Karlie's 3 year old dress. She loved the gown, but was crying because her brother made her mad. |
 |
| A dress for homecoming. This took me over 50 hours with the pleated bodice and the hand beading. |
With our daughters birthday being right in the middle of the holiday rush, it can be very difficult to make it feel special to her. We're already going to several parties, but none are for her. Everyone is getting and receiving gifts and birthdays tend to fall to the wayside with all of the fuss being made elsewhere. Unfortunately, I have found it difficult to get many people to spare time for her birthday when they are wrapped up in the holidays.
We anticipated this issue early on, as my husband also has a birthday just before Christmas. We and have maintained the same ritual year after year, ever since her first birthday. I make her a gown and schedule her portraits on her birthday. We dress her up and take her out to get her pictures taken and while we're at it, we take out to eat wherever she likes. She gets tons of smiles and compliments and a lot of fuss being made over her, and if that's not enough to make a girl feel special on her birthday, I don't know what is.
For the past three years, she has helped with the design of her dress. We will look at pictures of gowns on the internet and she will tell me which ones she likes. The week before her birthday, we will go to the fabric store and she gets to choose whatever fabric(s) she likes best. I will design her dress according to the weight and texture of her chosen fabrics and of course, she will approve it or tell me what she would like changed.
On her birthday she is given the dress and a gift from daddy and of course, her very special princess cake. Once her big night out is over, the gown goes onto her rack of dress-up clothes so she can wear it anytime she wants along with her jewelry.
If you'd like, have a peek at last years dress here.


I would need facing pieces that were simply shorter versions of the outer panels, but in the back I would need to consider the placement of the zipper.
I wanted 2 spaghetti straps, an inch wide. After I drew up my shapes of my pieces, I measured my girl and applied the measurements to my plans, accounting for my seam allowances.
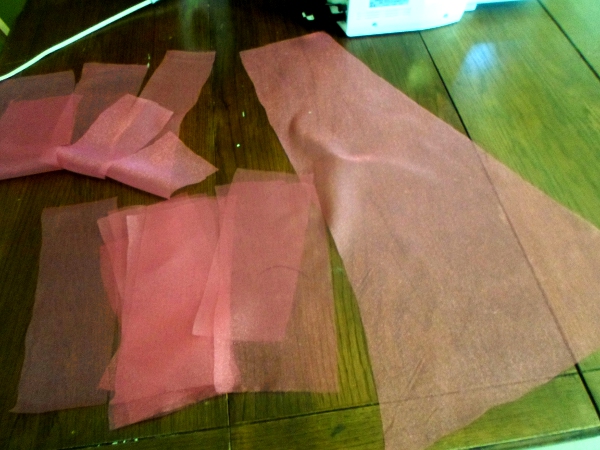
The ruffles that would be peeking through the gap in the side would be made out of the chiffon she selected.
***It's important to err on the side of being too big. You can always increase the width of your seams to shrink the item down. If you cut it too small, you're going to have to start all over. Give yourself a couple of inches to play with, and make sure you buy enough extra fabric to allow you to do so.

You can use tissue paper or crafting paper to do this. I do not recommend using newspaper, as it can be tricky seeing your lines and I feel like the ink could rub off on your fabric, depending on the type of fabric you're using. This is a thick and luxurious satin with a fairly heavy drape.

Of course, you would want to use fusible interfacing
on the backs of each piece, I chose not to use it.

I folded the edges back, pressed them, and folded them back again. Very carefully, I top stitched them down. I was careful to mark my turning point, so that I would pivot at the top of the gap rather than top stitching up the bodice. I don't want any stitches showing on the upper half of the dress.


I carefully matched up the seams of all of my panels before pinning the sections together and sewing along top and down the sides.

I hemmed the bottom of the facing pieces, and where the zipper went I tucked in and hemmed also.
Where this tuck occurred is where I sewed my seam to close up the two back pieces. I put a noticeable pin where the seam needed to stop, as I have ripped out many a back seam when it cut into the zipper space.

I find a zigzag stitch is best for hemming tulle or chiffon.


Once pinned securely, I was able to sew it in place, going very, very carefully over my initial top stitch so that there would only be one set of stitches showing.


I left it for a few days while I considered the best way to glam it up and have it feel cute and princessy without it being gaudy.
Miss Karlie had chosen very bright colors for sure, and too much bedazzling could easily put it over the top. Ultimately, I made a flower out of leftover chiffon and glued rhinestones onto the ruffles and 3 at the top of the bodice.

Of course, no birthday princess is complete without her crown. Although I started making jewelry a year ago, and knew I would be making her necklace and bracelet, the tiara sort of surprised me. I'd never done one before and it didn't occur to me that I could make one until I had finished the necklace.
Suddenly, the thing seemed doable and so it was. I wish I would have done pictures to show you how, but I didn't think of it until afterward.

Once I had her dress and her jewelry finished, birthday week was halfway over. Onto the cake!
No comments:
Post a Comment