

This hat was designed to go with these knitted, fur lined baby boots.
Materials:
Worsted weight yarn - I used Simply Soft acrylic yarn by Caron
Size 5 knitting needles
Large eye blunt needle, for sewing with yarn
Sewing needle
All purpose sewing thread in yarn color
4" faux fur fabric (off the bolt)
12" super soft fleece (off the bolt)
This pattern is knitted flat and sewing together with yarn and needle. Machine sewing is used for the lining.
Sewing needle
All purpose sewing thread in yarn color
4" faux fur fabric (off the bolt)
12" super soft fleece (off the bolt)
This pattern is knitted flat and sewing together with yarn and needle. Machine sewing is used for the lining.
Knitting Pattern
Top dome (Make 2)
CO 15
R1 - k all the way across
R2 - sl1, k2, p to the third last stitch, k3
R3 - sl1, k1m1, k to the second last stitch, k1m1, k
Repeat rows 2 & 3 for 25 more rows, or until work measures about 8 inches at the bottom. Garter stitch for three more rows.
Top Center
CO 15
R1 - k all the way across
R2 - sl1, k2, p to the third last stitch, k3
R3 - sl1, k all the way across
Repeat rows 2 & 3 until work measures about 10 inches long. Garter stitch the last three rows. Match up the knots on the side of the strip and the dome pieces and knit to length.
Sew the dome pieces to the center strip, one on each side, with right sides facing one another. The side which has the garter stitch in the center strip is the back of the dome.
Bottom flap
On the front of the brim of the hat, count 13 stitches from the center strip on both sides. Pick up stitches along the brim, and around the back between these two points. Here, you will begin knitting your flap.
Knit back and forth on both sides for 3 rows, creating a garter stitch.
For 15 rows, knit on the outside and purl on the inside, with a garter stitch edging on the last three stitches.
On row 16, place a stitch marker after the 18th stitch and before the 18th from the last stitch.
On row 17, knit the first three stitches, purl the next 15, knit across to the stitch marker, k3, purl to the last three stitches, knit the final three.
On row 18, knit all the way across.
On row 19, repeat as you did on row 17.
On row 20, knit to the stitch marker. Just past the stitch marker, begin binding off up to the second marker, knit across.
Ear flaps
You should have two sections of knitting on your needle for your ear flaps. Work one at a time, knitting on one side and purling on the other for three rows, then begin decreasing every row by knitting the second and third, and the second to last and third to last stitches together. Once you have gotten your ear flap down to two stitches, knit them in the round for ten rows to get a small rope. When you bind them off, leave a four inch tail to tie on the tassel.
Lining
 Once you have completed the knitting portion of the project, weave in the loose ends and begin making your pattern for the lining.
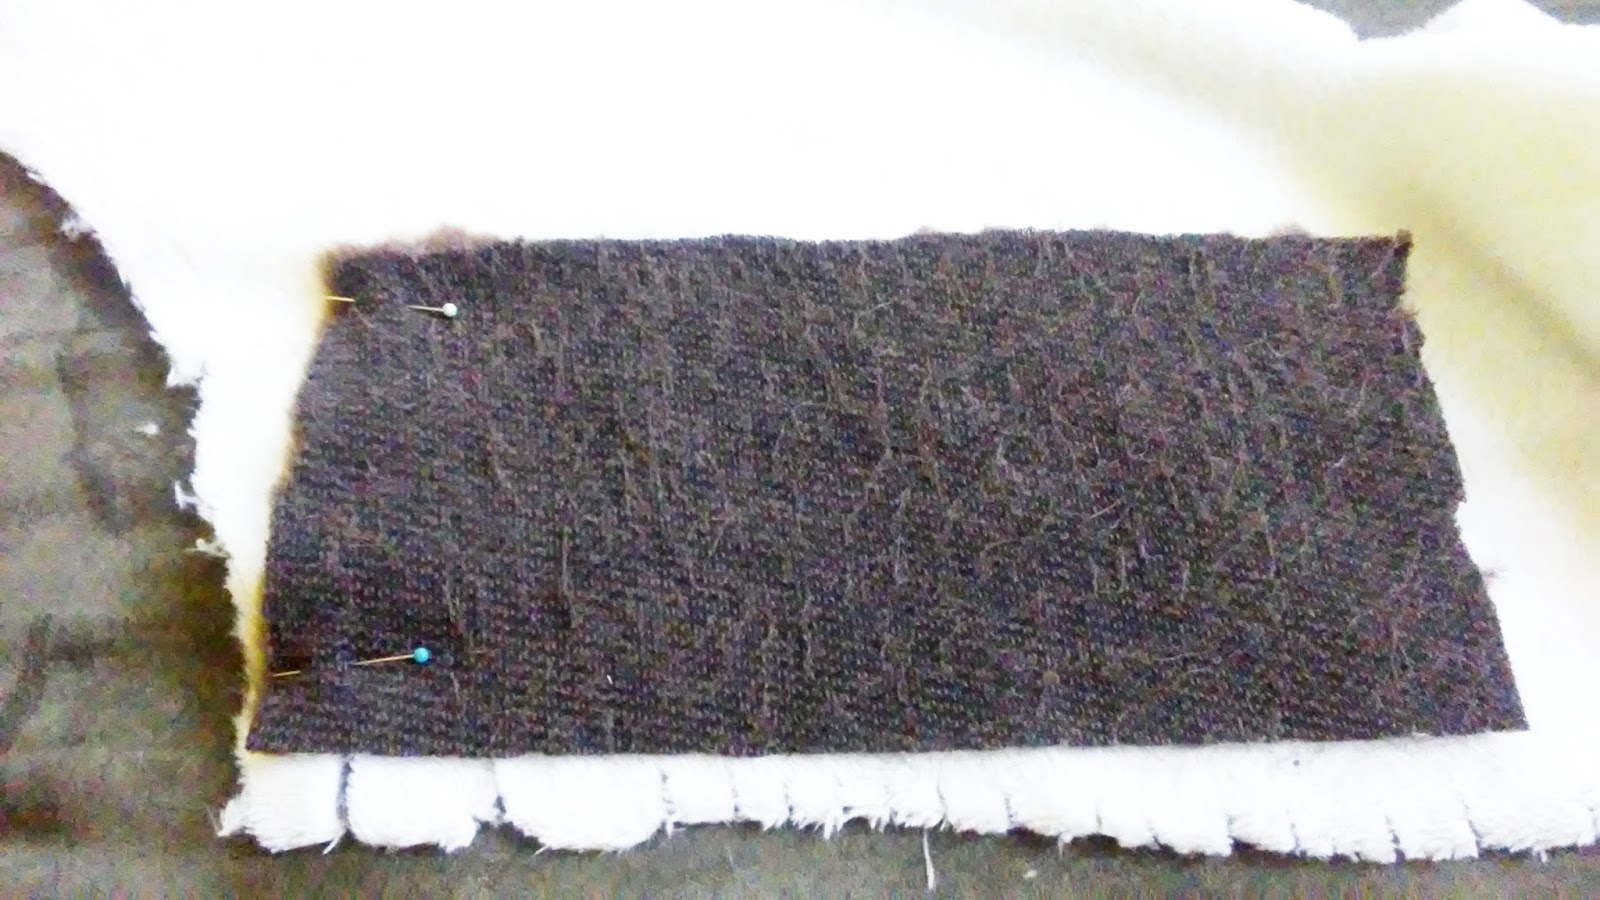
Lay your hat out on a sheet of paper and trace along the seams. Add a half an inch for stretch and another quarter of an inch for seam allowance. Also, and this is important, have your inner lining pattern come down an inch and a half further in the front than the knitted hat. Refer the the photo on the right.

You will only cut two pieces for your pattern. The dome, and the center strip.
Once cut, sew them together with right side facing, noting which end is the front and which is the back.
You will need to also cut a strip of fleece and a strip of fur that is about 12 inches wide and four inches tall for the front bill of the hat. The last piece you will need is the fur for the back flap. Only cut this approximately, leaving plenty of excess. You are going to cut it and sew it to fit during the assembly.
Assembly
Machine stitch the 12" x 4" strip of fleece and fur fabric together on three sides with a 1/4 inch seam, leaving the bottom open.
As you do this, keep a 1/4 inch of extra fleece lining at the bottom. This allows for even fabric after turning.
Trim the corners and turn right side out.
Pin the strip of fur for the back flap to the lining of the hat with right sides together. Use the knitted hat as a guide for where the flap piece should go - however, leave a good inch or more of fur fabric excess on both sides of the hat.
Machine stitch this in place.

Sew the front flap to the lining with the fur side of the flap facing the right side of the fleece lining.
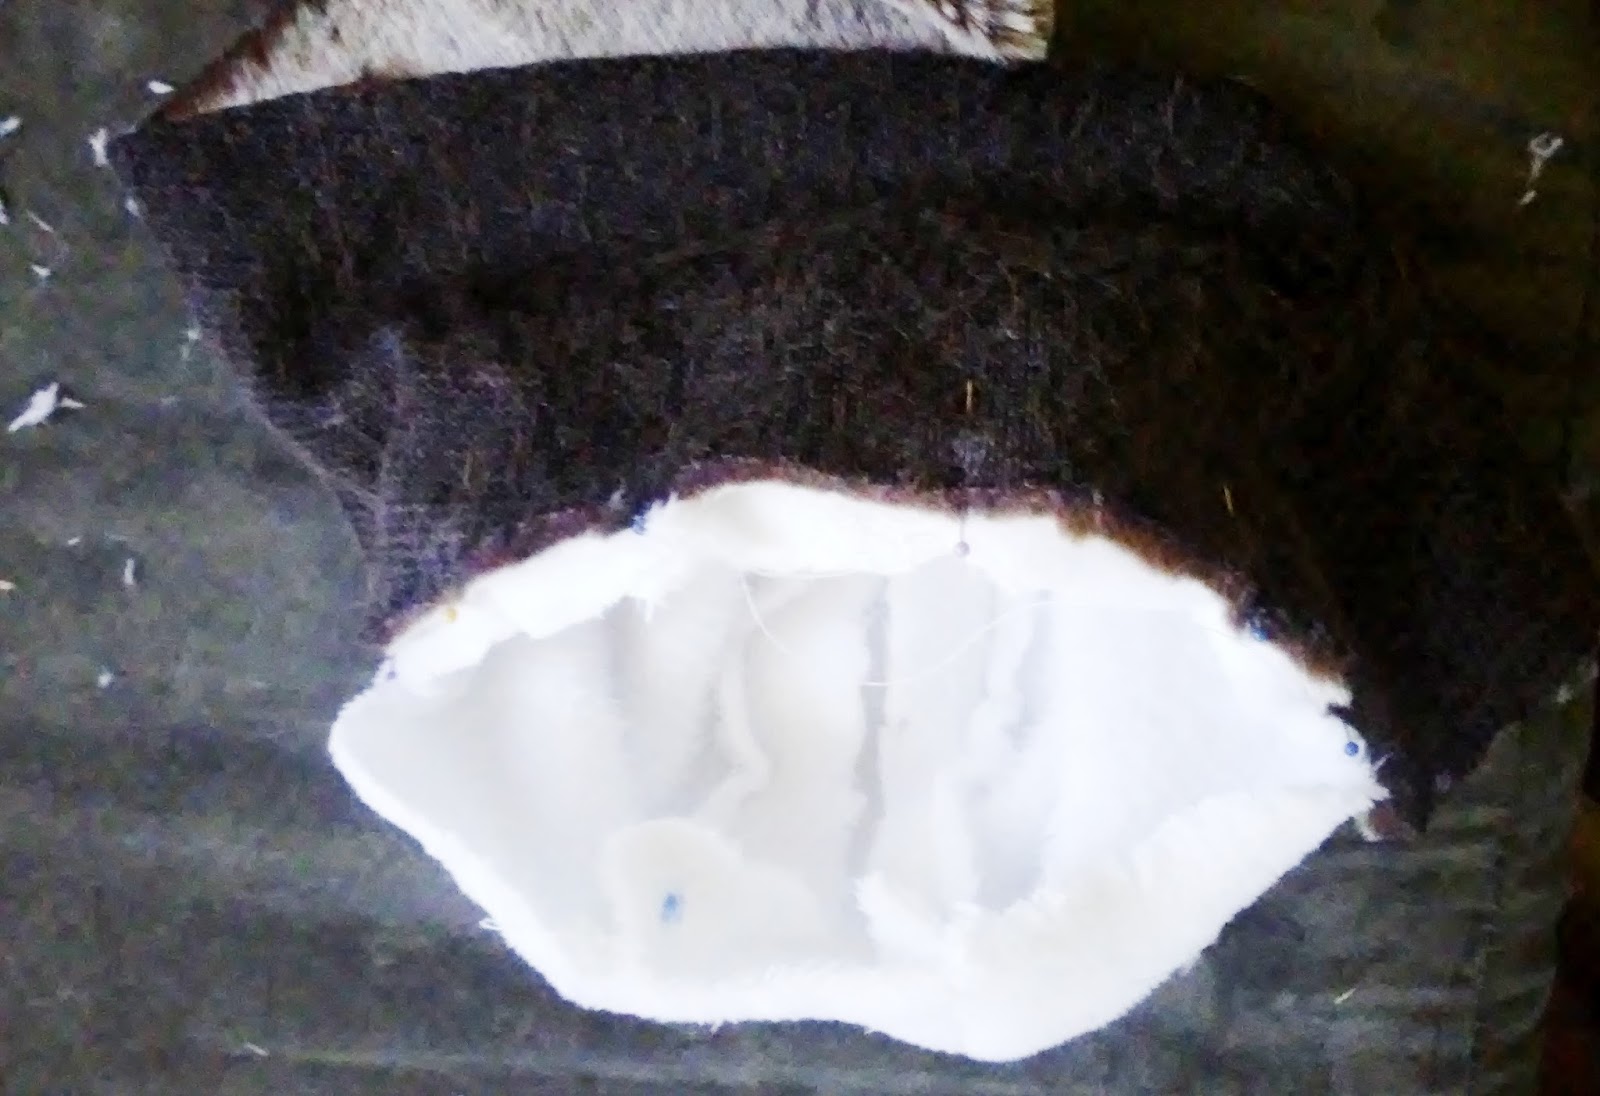
The photos on the right show the lining assembly both right side out and inside out.

Place the lining over a rounded surface (I used my knee) and fit the knitted hat over it snuggly. Make sure there is an inch of lining protruding below the brim of the front of the hat, and that the back fur flap extends past the knitted hat.
Using a standard needle and matching thread, stitch the knitted hat to the lining as shown in the picture. Hide the stitches in the weave of the knitting. The stitches will be concealed within the pile of the lining.

 Cut the back flap fur piece so that it can be tucked up and pinned in place. Trim, if needed (see photo on left).
Continue tucking and pinning from sides and around the back, up to the front of the hat.

Stitch the raw edges of the front flap to the front of the knitting, then fold it up.
Hand stitch the flap in place, about an inch from the bottom, and hand stitch the fur fabric to the knitted fabric as shown in the photo on the right.

Use the 4 inch length of yarn at the end of each rope to tie the bundles of yarn to the rope at the knot.
Secure by sewing repeated stitches with a needle and thread, and leave the thread attached to sew on the fur cuffs.
Cut 2 strips of fur fabric, about 4 inches by one inch. Roll this over lengthwise, and sew one end to the tassel using the thread that is still attached. Wrap the other side around, tuck the end under, and sew in place. Knot the thread inside the fur cuff.
ReplyDeletei read your post such a knowledgable post.
read my post promotional badges online
ReplyDeleteI like you write style. thanks for an awesome trick.
Personalized badge
Cute
ReplyDelete