


These tree ribbons came out even cuter than I expected, and much better than my husband guessed when he saw the denim strips. He asked me skeptically if I really thought they would turn out to look good. Do you not know me? Silly!
I made two dozen of them and they give my tree the country-cozy feeling that I like in the fall. There is just something about denim on a Christmas tree that feels right to me. Add in the contrast of textures with the burlap and cotton muslin, the splash of red and natural grape vine and I just adore my little bows! Also, like many of my crafts, these were done for free using materials I had on hand or found outside. You can come up with some creative combinations if you look around your own home to see what's available!
Materials:
Old Jeans (adult sized)
Burlap
Cotton Muslin
Scrap Yarn
Polished Hemp Cord
Salt Dough
Red Paint
Woody Tendrils (from a grape vine)
Glue gun and glue sticks
To start with, cut the pant legs off of your old jeans. It's best to use jeans that have good denim. Trim off the inside and outside seams as well as the cuffs, so that you have four wide strips of denim to use. Lengthwise, rip the jeans into two or three strips. Don't use scissors for this, the ripping helps with the fray.
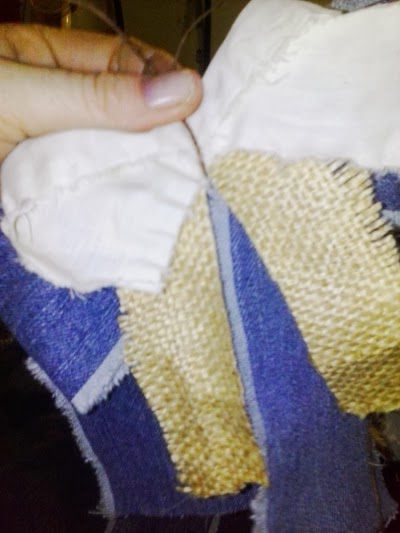
Take a needle or your fingernail and pull out ten or so outside strands of thread, to make a 1/4 inch fray.
Take a needle or your fingernail and pull out ten or so outside strands of thread, to make a 1/4 inch fray.


Finding the center of your strip, fold the sides in and under. Then fold the ends down, as shown in the photos. This can be tricky and takes a bit of practice.


Cut a swatch of burlap, 4 inches long and two inches wide, then cut a slit up the center of it.

That recipe is here: Quickest Ever Salt Dough Recipe at Rainy Day Mum
I rolled the salt dough into tiny balls, about the size of blueberries. I did poke holes into them with a needle, thinking I would sew them to the bows which would have worked. But I realized I had new glue sticks so I didn't go that way.
I used enamel paint (and some gloves) to paint the "berries" bright red and dried them on craft paper.


Had I not had glue sticks, I would have used a carpet needle and upholstery thread to sew the beads on and secure the tendrils.


No comments:
Post a Comment