Showing posts with label from Scratch. Show all posts

Friday, November 28, 2014

Stick Figure Family Tree Ornaments


Yesterday, my little girl told me that she wanted to make some ornaments for the Christmas tree. We didn't have a lot on hand to work with, but I knew I had a nice little stash of glitter she could have fun with, and I knew I could make salt dough. Considering what other crafting supplies I had squirreled away, these are what came to my mind. Consider them a medium difficulty level, as my six year old daughter made them with (a lot of) help from me.

Supplies:
Salt dough:
       1 cup flour
       1/2 cup salt
       Water to consistancy
Food Coloring
Size 2 jewelry wire
White craft paint
Pink Paint (I used pink glitter nail polish)
Fine point Sharpie or gel pen
White glue
Paint brushes
Assorted glitter
Clear Acrylic Spray

Step 1: 
Mix the dough and separate out enough egg-yolk sized balls to make the bodies. We have six family members, so we made six bodies. Make sure you have a good consistency. You may need to add more flour or more water, to keep the dough from being too sticky or too grainy.

Fold in food coloring and knead until the color is uniform. I didn't use gloves, as you can see, and my fingers are now pink.


Step 2:

Form the bodies into pear shapes. These do not need to be completely perfect, but try to get them symmetrical. They will puff out a little during baking.

Take plain white dough, the size of a hominy kernel, and form the head.


Step 3:
Take a one inch piece of jewelry wire, form a coil on one end and push it up into the head, to form a neck. Then push the other end into the body.

A small round tube, the size of a lolly pop stem is the perfect diameter to wrap the jewelry wire for all purposes of this project.

For the ladies, since we have curly hair, I wrapped two inch pieces of wire to form ringlets. I then pressed four of them into the top of the head.

On all ornaments, make a coil on one end of a one inch piece of jewelry wire, and press it down into the top of the head. This is for the hanger.


Step 4:
Cut two 4 inch pieces of jewelry wire to make the legs and arms.

Press these all the way through the body, near the head and at the bottom.


Step 5:
With each ornament complete with legs, arms, hair for those who have it, and hanger hooks, they are ready to bake.

Put them into the oven at 250F for four hours.


Step 6:
Although the heads of the ornaments were white before and after baking, I felt that giving them a couple of coats of white acrylic craft paint gave them a more even surface. However, it is not completely necessary.

Curl the ends of the arms and legs into circles for the hands and feet.  I used a gel pen to draw on the eyes, noses and mouths, in a Charlie Brown inspired style.

Paint a small dot of pink glitter nail polish on each cheek, to give it an antiquated blush. Plain pink paint will also work.


Step 7:
When making the bodies, I made sure that I created colors that corresponded to the glitter I had put away. Because it was likely that there would be holes in the glitter, I wanted to mask it as much as possible.


Water down the white glue to make it easier to paint onto the bodies, and be sure to use a glue that will dry clearly. You want to be careful not to saturate the salt dough, get a good coverage.

Quickly sprinkle on the glitter and try to get it as even as possible.

Use a dry paint brush to dust away any glitter from the face. Gently spray it with a couple of light coats of the clear enamel, to set the glitter and keep it from flaking off.


Place a cord through the hanger hooks, clean away any stray glitter from the faces, arms and legs, and your little stick figure ornaments are ready to hang on your tree!

Monday, September 22, 2014

Little French Kitty

Gosh, has it been a while! I have been preoccupied with work and school and art business, not to mention the most important piece of me, my husband and kids.
The cooler whether has me itching for some good old making, and I found the time to squeeze in a new knitting project! And since I haven't forgotten this dusty old blog with it's crafty following, I went the extra mile and wrote up the pattern. I hope you like it!

This base of this plushy toy can be made into any sort of animal you like. My daughter wanted a cat, so a cat she gets. It is a rather tricky pattern, but I hope I made it easier by adding some charts and some pictures.

Materials:
4 colors of worsted weight yarn: 1 for body, 1 for accent, 1 for eyes, and black for whiskers.
Size 2 knitting needles; either circular or DPN to work in the round.
Small crochet hook
Tapestry needle
Filler.

Size of plush is approximately 8 inches tall and six inches wide.

He looks French, doesn't he?


CO 4, join to work in the round.
k1m1 x 4 (8)
k8
k1m1 x 8 (16)
k16
k2m1 x 16 (24)
k24
k2m1 x 24 (36)
k36
k3m1 x 36 (48)
k48 for 12 rows, then begin decreasing for the neck.
k3, k2tog x 48 (39)
k39
k2, k2tog x 39 (32)
k32
k2, k2tog x 32 (24)
k24
k2, k2tog x 24(18)
k18 for 2 rows, then place 8 stitches on reserve.
turn, p10, turn
k1m1, k8, k1m1 (12)
p12
k1m1, k10, k1m1 (14)
p14
k1m1, k12, k1m1
p16
Place the working stitches on reserve and pick up the 8 stitches that were placed on reserve earlier.
p8
k1m1, k6, k1m1 (10)
p10
k1m1, k8, k1m1 (12)
p12
k1m1, 10, k1m1 (14)
p14
k1m1, 12, k1m1 (16)
p16
Keeping the stitches on your needle, pick up the 16 stitches that were placed on reserve earlier. Join stitches in the round and *Knit 2 rows. (32)
Begin increasing the body by adding 4 stitches on every other row. My method for doing this is to add one stitch to the ends of each needle in a sequence spanning 2 rows. I did it this way to make the additions virtually invisible.

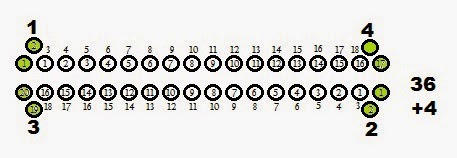
TWO ROWS: K1m1, k15, k1m1, k14, k1m1, k16, k1m1, k18 (36)
*Use the following chart for reference:


Knit one row.
TWO ROWS: k1m1, k17, k1m1, k16, k1m1, k18, k1m1, k20 (40)


Knit one row.
TWO ROWS: k1m1, k19, k1m1, k18, k1m1, k20, k1m1, k22 (44)


Knit one row.
TWO ROWS: k1m1, k21, k1m1, k20, k1m1, k22, k1m1, k24 (48)


Knit one row.
TWO ROWS: k1m1, k23, k1m1, k22, k1m1, k24, k1m1, k26 (52)
Knit one row.
TWO ROWS: k1m1, k25, k1m1, k24, k1m1, k26, k1m1, k28 (56)


Knit one row.

You should now have 56 stitches.

Locate the section that will be the front of the animal. Take two stitches off of each side of the front and place them on the back needle. This way, you will have 24 stitches in the front and 32 stitches in the back. Place the front 24 stitches on reserve. You will now begin shaping the animal’s backside.
Turn the work and purl all 32 stitches.
K1m1, k12, k2tog, k4, k2tog, k12, k1m1 (32)
Purl 1 row.
k1m1, k11, k2tog, k6, k2tog, k11, k1m1 (32)
Purl 1 row.
k1m1, k10, k2tog, k8, k2tog, k10, k1m1 (32)
Purl 1 row.
k9, k2tog, k10, k2tog, k9 (30)
Purl 1 row.
k8, k2tog, k12, k2tog, k8 (28)
Purl 1 row.
k7, k2tog, k14, k2tog, k7 (26)
P2tog, p22, p2tog (24)
k2tog, k4, k2tog, k6, k2tog, k4, k2tog (18)
P2tog, p14, p2tog (16)
k2tog, k2, k2tog, k6, k2tog, k2, k2tog (14)
P2tog, 10, p2tog (12)
k2tog, k2tog, k4, k2tog, k2tog (6)

You can see the decreases on the bottom of the animal.


Divide your front stitches in half and mark the center. You want to place the middle six stitches on your needle, intermittently with your remaining six back stitches. The other stitches will be placed on reserve and later worked into the legs.
Please refer to the photograph. To do this, take the nine stitches from the far right side of the front and place them on reserve. Next, take the nine stitches from the far left side of the front and place them on reserve. This leaves you six working stitches in the center of the front of your animal. Now, one by one, slip these in between the six working stitches from the back of your animal so that you have twelve working stitches on your needle and the gap and your front and back pieces are now joined between the legs.
K2tog, K2tog, Slip the back loop over the front loop to bind off.
Repeat this process for the remaining ten stitches until you have joined and bound off all.

This photo generated an awkwardly hilarious Facebook thread. I have strange friends.


Legs and arms:
Pick up 22 stitches from around the hole of the arm or leg.
Knit in the round for 12 rows.
Bind off.

Repeat this on the other leg and arm holes.

Stuff the animal with filler of your choice before closing the arm and leg holes.

To close the arms and legs:
On the bottom of the leg or arm, pick up 8 stitches and knit them across.
Turn. Slip the first stitch, Purl 5, p2tog; insert a crochet hook into another loop on the side of the arm and pull another stitch through to make the stitch count back to 8.
Turn. Slip the first stitch, knit 5, k2tog, insert a crochet hook into another loop on the side of the arm and pull another stitch through to make the stitch count back to 8. 


Repeat 4 times, until you have 8 rows. You should have 8 loops remaining on the top of your arm or leg. If you need to, you can use the same loop twice in order to fully close the gap and not have excess puckering.
Instead of slipping the first stitch, P2tog, p4, p2tog. (6)
Pick up a stitch from the leg or arm, knit it together with a stitch from your needle.
Pick up a second stitch from the leg or arm, knit it together with a stitch from your needle, and then pull the first stitch over the second stitch in order to bind off. Repeat this across the top of the arm or leg hole until completely closed.


Once the arms and legs are closed you can now determine whether you are going to be making a bear, a cat, a bunny or something else! I chose to make a cat (or rather, my daughter chose), but you can easily modify the length and shape of the nose, ears and tail to make a different kind of animal.

For the cat’s nose:
Pick up 16 stitches from the front of the face, in an oval shape to knit in the round.
Knit 4 rows.
K2tog 8 times, to make 8 stitches.
Knit 1 row.
K2tog 4 times to make 4 stitches.
Stuff with filler before knitting 2tog for the remaining stitches until you are down to one. Secure your final stitch with a slip knot and pull the loose tail of yarn through the inside of the head and out through the back of the neck, using a crochet hook. Pull all loose threads through the and out through the back of the neck.
Use a tapestry needle to pull a piece of yarn taught down the middle of the nose, forming the cheeks. This resembles a butt shape. Next use the tapestry needle and yarn color of your choice to sew the nose and eyes, using a satin embroidery stitch. Use black yarn to make the whiskers.

To make the cats ears:
from the right, pick up 10 stitches on the top of the head, where you want your right ear to be placed. Use your alternate color and make sure your knit stitches are facing the front. Knit and purl to make 5 rows.
P2tog, p6, p2tog
K2tog, k4, k2tog
P2tog, p2, p2tog
K2tog, k2tog
P2tog, pull through and secure tail end.

Turn the cat around and this process behind the cat's ear, using your main body color and keeping your knit stitches facing the back of your cat. You will tie off the tail ends on the inside of the two ear flaps, and use a tapestry needle to sew them together. This will make the cats ears stand up.


To make the cats tail:
Pick up 12 stitches
Join and knit in the round for 20 rows, or until your tail is as long as you’d like.

Knit a collar:
Whether you’re making a bear or a cat, a bunny or a puppy, you’re going to need to hide the tail ends that you weaved into the back of the neck. I knitted a collar, but you can use a ribbon or strip of fabric.
CO six stitches.
S1, K5 (Slip the first stitch, knit 5)
S1, P5 (slip the first stitch, purl 5)
repeat for approximately 30 rows.

Sew onto the animal to cover any knots.


Wednesday, January 1, 2014

A New Year, A New Project!

I decided that 2014 is going to be a relaxing year. I'm going to make that happen. Because I'm in complete control of my universe and when I say I'm taking it easy this year, it's set in stone. SO. I'm lining up a soothing, easy project that may well carry me all the way to December... are you laughing? If you know me, probably! 'Cause you know, the taking it easy thing really isn't me.

Ok, no more fooling, let me tell you what I'm really up to! In 1999, I made a set of four stockings and a count-down-to-Christmas calendar for my family. Each stocking is navy blue cotton with faux applique scenes depicted out of scraps of fabric that I used some sort of iron on adhesive to affix, and then I used silver glitter fabric paint to go around the edges. When the subsequent children were born in '06 and '07, I made them new ones to match.


To be perfectly honest, I hated these stockings almost immediately after I made them. They're garish and ugly and at this point, I can do WAY better! I'm almost embarrassed year after year to pull these out of storage and hang them up. Of course, my husband who has a very strange idea of sentiment and gets attached to all of the wrong things fights each year to keep them. Right now, a week after Christmas, he could give two shits about them or the calendar or anything related to holidays. I'm starting new stockings and a calendar now, so when the Thanksgiving turkey is slowly churning in our bellies in November, I will a have a stronger argument than his for retiring these atrocious things to the attic forever. I mean, babe, I've worked ALL year on these new stockings! We'll see how well that goes...
Here's my plan for the new calendar. I'm really big into celebrating the origins of Christmas (aka Yule), particularly focusing on the pagan aspect, in December. Odin was only one of the forbearers to modern Santa. There's also St. Nick (he was a real saint), Sinter Klaus... Ok Google that shit because I don't really feel up to explaining it all.

Odin, who in MY portrayal is modeled after Gandalf (because Gandalf is f'ing awesome and needs to be hung in every home for Christmas!), is set among a moon lit sky on a tree lined mountain slope. The moonlit sky is very important as it is indicative of the winter hunt. It's all relevant in pagan/Yule lore.
So I photoshopped Gandalf from a scene in the movie "Lord of the Rings" into two separate images I found that had the sky and ground backgrounds I wanted. When I had everything jiving just the right way, I opened the image in Window's paint and saved it as 256 bitmap. That degrades the colors to give me an easy to follow map.


At this point, it was pretty simple to trace this out onto paper and then onto a piece of white cotton muslin. I put the fabric into an embroidery hoop, took the image to the sewing shop to buy the appropriate colors of embroidery floss, and am filling in the entire image with tiny stitches as if I'm doing a paint by number. This technique works extremely well for making heirloom products (such as family portraits onto pillows), or making custom patches or badges, as I show you HERE.
 
 
I have been wanting to do a large tapestry in this medium for a very long time, and now I have a great reason! So, here is the start:


The finished tapestry will be 11" x 14" and will be sewn as a panel onto a new count-down-to-Christmas calendar. If you're wondering what I mean by that, picture a piece of fabric with pockets numbered 1 to 25 and an object that is moved from one pocket to the next, each day in December. The numbered pockets will also be embroidered and I'm planning to use high-end fabrics for this project as I'm expecting these to last my family for another 15 years, if not longer. They may last until I'm an old lady. My family may fight over my dead body for them... or maybe not! It's going to be a fun project though and it will give me a reason to sit on my ass and watch trashy television, which I'm expecting to do a whole lot of this year.

Oh! And I'll keep you posted on progress. If you have any questions, shoot 'em in the comments. 


Sunday, December 1, 2013

DIY Christmas Tree Bows From Re-purposed Materials


 These tree ribbons came out even cuter than I expected, and much better than my husband guessed when he saw the denim strips. He asked me skeptically if I really thought they would turn out to look good. Do you not know me? Silly!

I made two dozen of them and they give my tree the country-cozy feeling that I like in the fall. There is just something about denim on a Christmas tree that feels right to me. Add in the contrast of textures with the burlap and cotton muslin, the splash of red and natural grape vine and I just adore my little bows! Also, like many of my crafts, these were done for free using  materials I had on hand or found outside. You can come up with some creative combinations if you look around your own home to see what's available!

Materials:
Old Jeans (adult sized)
Burlap
Cotton Muslin
Scrap Yarn
Polished Hemp Cord
Salt Dough
Red Paint
Woody Tendrils (from a grape vine)
Glue gun and glue sticks

To start with, cut the pant legs off of your old jeans. It's best to use jeans that have good denim. Trim off the inside and outside seams as well as the cuffs, so that you have four wide strips of denim to use. Lengthwise, rip the jeans into two or three strips. Don't use scissors for this, the ripping helps with the fray.
Take a needle or your fingernail and pull out ten or so outside strands of thread, to make a 1/4 inch fray.

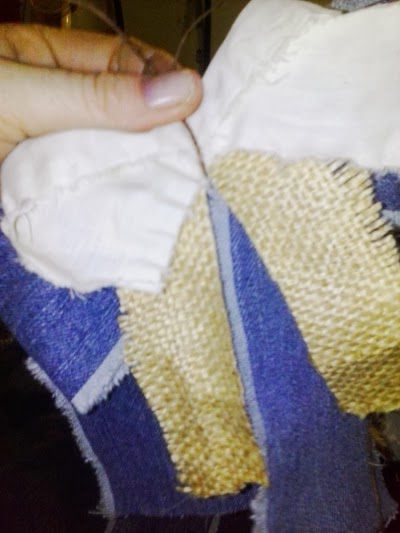
Finding the center of your strip, fold the sides in and under. Then fold the ends down, as shown in the photos. This can be tricky and takes a bit of practice.

 Slide a piece of scrap yarn into the center of the bow and tie it in place. Trim the ends of the yarn.
 Tear the cotton muslin into strips, 12" long and 1 1/2" wide. It's good if it looks a little rough, but trim the excess strings. You want it to look tattered but tidy.

Cut a swatch of burlap, 4 inches long and two inches wide, then cut a slit up the center of it.
 Shape the muslin into a bow as you did with the denim and tuck the burlap behind it. Use a foot long piece of hemp cord and wrap tightly around the two bows and the burlap. Leave four to five inches of cord at the top of the bow to become the hanger.
 Salt dough beads are super easy to make, and I found a recipe that I was able to make and then paint within minutes! Really! I was skeptical too, but I tried it and it worked.

That recipe is here:  Quickest Ever Salt Dough Recipe at Rainy Day Mum

I rolled the salt dough into tiny balls, about the size of blueberries. I did poke holes into them with a needle, thinking I would sew them to the bows which would have worked. But I realized I had new glue sticks so I didn't go that way.

I used enamel paint (and some gloves) to paint the "berries" bright red and dried them on craft paper.
 I know that not everyone has a boat-load of grape vine growing in their backyard, you can probably find these dried woody tendrils at your local craft store (look in the silk or dry flower section). Otherwise, you might be able to buy them online. If you can't find them anywhere, a good substitute would be dark metal wire, twisted and wrapped into curly-Q's.
 I pushed the ends of the grape vine tendrils underneath the cord and used a daub of hot glue to simultaneously secure the tendrils into place and glue the red berries to the front of the bow.

Had I not had glue sticks, I would have used a carpet needle and upholstery thread to sew the beads on and secure the tendrils.
 I strongly resisted the urge to add a glittery element, a touch of gold would have made these even better. But I wanted to keep them as organic and natural as possible.


Caramel Apple Cinnamon Rolls

Dough:
1 cup hot (not scalding water)
1/4 c granulated sugar
1 packet active dry yeast
1/2 cup shortening
1 tsp salt
3 to 5 cups flour

Mix the water, sugar and yeast in a large mixing bowl and allow it to sit for 20 minutes until foamy. Add shortening and salt, beat for one minute. Fold in 3 cups of flour and begin to knead. Add flour one half cup at a time, when the dough becomes sticky. Use as little flour as you can. Too much flour makes bead heavy.
Knead for ten minutes. Too little kneading will result in coarse bread.

Allow to rise for 45 minutes in a warm place until double.

Filling:
4 apples, peeled and cubed
Water
1 tsp. Lemon juice
2 tbs. Butter
1 tsp. Salt
1 cup sugar
2 tbs. Cinnamon

Boil the apples with lemon juice and salt. Strain and mash with a fork, leaving it a little chunky. Stir in butter.
Punch down bread dough and roll out to 1/2 inch thick rectangle.
Spread evenly with apple sauce and sprinkle with sugar and cinnamon. Roll up and cut into eight slices.
Grease a cookie sheet and place the cinnamon rolls with sides touching. Let rise for 30 minutes in a warm place.

Preheat your oven to 375F and bake rolls for 20 to 22 minutes.

Topping:
Two cups of brown sugar
1 cup whole milk or half and half.
1/2 tsp. Salt
2 cups walnuts

Bring brown sugar, milk and salt to a boil I'm a medium saucepan stirring occasionally. Cook for 5 minutes. Spoon quickly over cinnamon rolls and top with walnuts before the caramel sets.

Monday, November 18, 2013

Homemade Peppermint Chocolate Syrup

Hey. It's peppermint and chocolate. I could tell you why I love it but I don't think I need to. It's that season, past putting pumpkin in everything and now we're moving on to eating and drinking ridiculous amounts of peppermint spiked concoctions!

You need:

Bottle to store the syrup
3 tsp pure peppermint extract (1 tbs or 1/2 fluid oz)
3 cups white sugar
1 1/2 cup water
1 1/2 cup powdered baking cocoa
1 tsp salt

In a large saucepan (the syrup will rise when boiling and boil over if you're not careful so make sure you use a pan with plenty of extra room), combine the sugar and water. Heat to steaming and whisk in the cocoa, salt and peppermint extract. Don't add too much peppermint, pure extract is really potent! Boil for 1 to two minutes, stirring constantly. Be careful of boiling over. Boiling hot sugar syrup can cause some nasty burns! Once it has cooled down enough to not melt the bottle (or shatter it if you're using glass), use a funnel to pour the syrup into your container and put it in the fridge.

Make sure you shake it well before using it, in case the peppermint extract rises to the top. That doesn't taste nice!

What do you do with it besides resisting the urge to drink it out of the bottle? You can:

Add it to coffee with some half and half or cream, or milk, or just drink it in plain coffee.
Drizzle it on your cheesecake.
Drizzle it on any cake.
Drizzle it on pancakes.
Use it as a dip for apples or other kind of fruit.
Use it in cocktails.
Use it in many baking recipes.
Stir it in milk, microwave, and you have peppermint hot chocolate - or drink it cold, even.

Really, you can add it to just about anything!


Saturday, November 9, 2013

Hand Embroidered Candles and Holly - Holiday Ornaments 2013

 Last year, I made and shared tutorials for 7 different holiday ornament designs:

Knitted Cat
Knitted Dog
Knitted Bear
Knitted Mouse
Glitter Kitty
Denim Stars
Wooden Snowmen

And the year before, I shared:

Cereal Box Painted Faux Metal Stars


This year, I have already begun my tree ornaments and I will surely have another design or two to share. :)

Before continuing with this tutorial, take a look at this one, which explains the technique for this embroidery technique. I used the Long and Short Stitch to fill in the blocks of color of the design below.

Materials:

  • Blocks of fabric with embroidered design on the front
  • Scissors, needle and thread
  • Crushed velvet fabric
  • Lace trim
  • Poster board or sturdy card stock
  • Strips of brown paper bag

Print the pattern to the left, so that the printed version is approximately 2" tall. Place a 4" x 4" swatch of white cotton fabric on top of the pattern and trace it. If necessary, use a window or a light box to see through the fabric.

Using the Long and Short stitch, fill in the blocks of color with embroidery floss. I filled in the holly with 3 shades of green; the candle with 3 shades of tan/cream; the flame with both yellow and orange and the ribbon with two shades of red.

Using a round object, approximately 3 inches wide (like a pasta sauce lid), trace a circle onto the card stock.
Cut a piece of velvet (or your chosen backing material) to a 4" inch wide circle. Use a needle and thread to loosely sew a basting stitch around the edge of your velvet.
Place your round cardstock on top of the wrong side of your velvet swatch and pull the thread to cinch it up around the cardboard and tie it off.
You could use twine, yard or any tie material of your choice, I decided to use a strip of brown paper sack and twisted it tightly to make a small rope. I sewed the flat ends into the ornament.
I sewed the lace trim around the edge of the ornament.
I pinned the embroidered block of fabric to the front of the ornament, and sewed it in place using small, even stitches.